Bicycle Touring with Mapforge
Mapforge is a great companion for your next bike tour. Plan your route on the desktop, then open the same map on your phone and follow your track with compass mode and a live elevation profile. This tutorial walks you through the workflow.
Plan your route
There are two ways to get a track onto your map: create one with the built-in bike routing, or import an existing GPX file. It's useful to use a basemap that shows existing bike infrastructure.
Create a track manually with bike routing
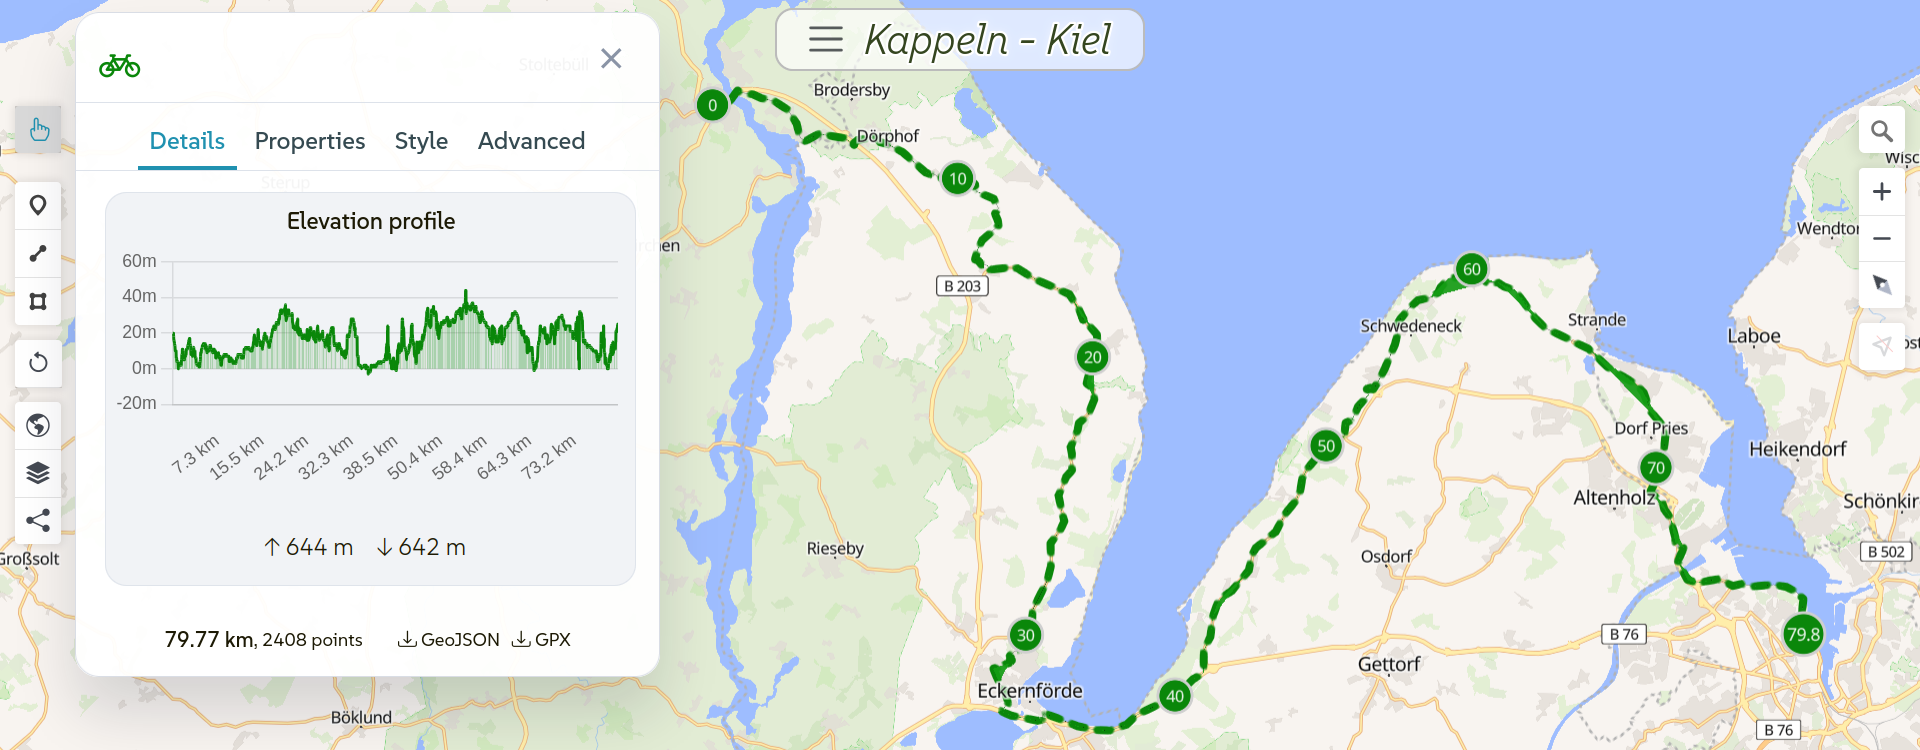
Create a new map after logging in. Select the bike routing tool from the 'draw line' menu (or press b on the keyboard). Now click on the map to place waypoints. Mapforge will calculate a bike-friendly route between them using OpenStreetMap data.
You can also create the track without automatic routing, by creating all points manually (select 'Draw line' (l) for this).
See the map of this track for reference.
You can drag waypoints to adjust the route after placing them. Add as many waypoints as you need to shape the route to your liking.
Import a GPX track
If you already have a GPX file from another app like Komoot or Bikerouter, you can import it directly. Open the layers modal, click the import button and select your file. Mapforge supports GPX, KML and GeoJSON formats (up to 2.5 MB).
The imported track will appear on your map with elevation data, ready to use.
Convert a GPX track to a route
Imported GPX tracks are plain lines without routing metadata. Converting a track to a route gives you waypoints, and extras like steepness and surface information.
To convert an imported track, select it on the map, open the edit panel, and go to the Advanced tab. Under "Convert to routed track", choose a profile (Foot, Bike, or Car).
Mapforge will extract waypoints from your track, snap them to the road network, and calculate a route using OpenRouteService. The result appears as a new feature alongside your original track. The routed track gets dashed styling, kilometer markers, and route extras data.
The final route may differ slightly from the original since it follows the road network, but it will preserve the overall path. You can adapt it to your needs and delete the original track afterwards.
Customize your map
Once your planned track is on the map, you can tailor everything to your ride:
- Segment your track: right-click on the track to split it into sections at any point. This is useful for highlighting different parts of your route for example in multi-day rides.
- Style your track: change the track color, line width, and enable distance markers to see kilometer markers along the route.
- Choose a background map: switch to a base map that suits cycling, such as the topographic or bike map, in the map settings. You can also enable 3D, contour lines or a hillshade effect.
- Bicycle tracks overlay: Add existing bicycle tracks to your map to plan your ride along them (Layers modal -> 'Add Layer').
- Add points of interest: mark stops, water refills, or scenic viewpoints as point features on your map. You can also copy important waymarks from overpass layers.
- Share your map: decide whether to keep your map private or share it publicly so others can ride your track.
Color your track by steepness or surface
For routed tracks, you can color the line based on steepness or surface type.
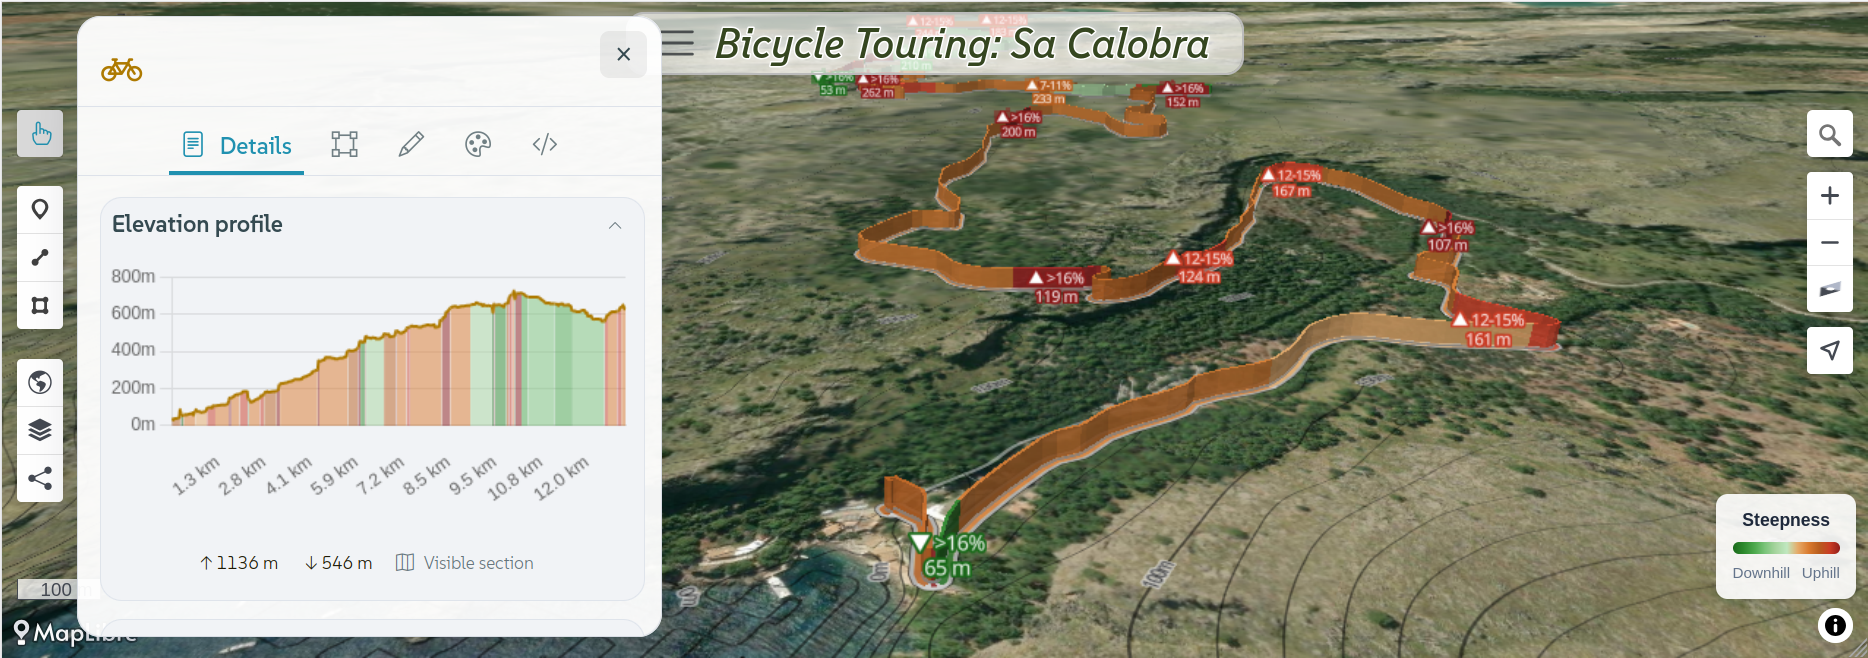
In the style panel of your routed track you'll see a line color dropdown with extra options. Choose one to apply data-driven coloring:
- Steepness: gradient from green (downhill) to red (uphill) with percentage ranges. Labels show steep sections with arrows (▲ 12-15%) and distances.
- Surface: discrete colors per surface type (paved, gravel, dirt, etc.). Labels show surface name and segment length.
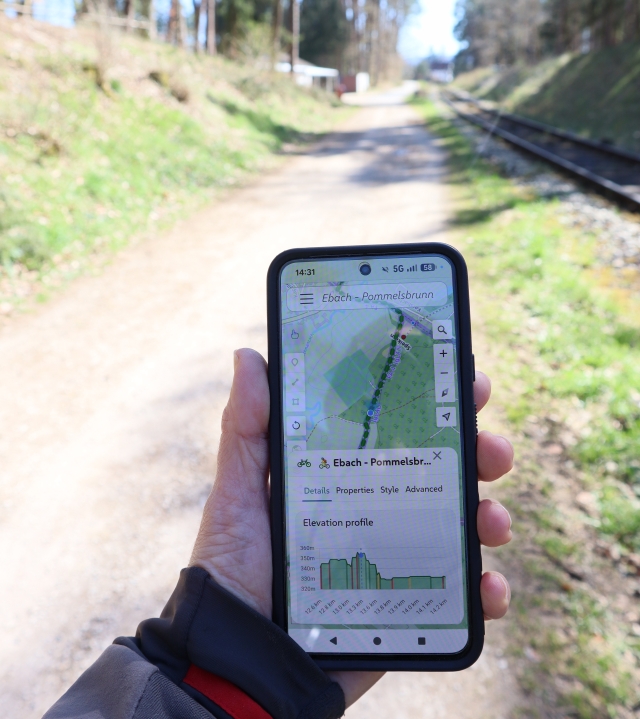
On the road
Open the map on your phone: Either in the browser or the installed app. Your track is already there, synced in real-time.
Compass mode
Tap the geolocate button (right screen side) once to follow your position on the map. Tap it again to activate compass mode. The map will rotate to match the direction your phone is facing, so the road ahead is always at the top of the screen.
Your position is shown as a dot with a directional cone indicating where you're heading. The screen stays on automatically while compass mode is active, so you don't need to keep tapping your phone.
Elevation profile
Tap on your track to open its details and see the elevation profile. The chart shows distance vs. elevation, colored by steepness. Orange and red for uphill sections, green for downhill. The elevation profile always renders for the part of your track that is currently visible on screen.
As you ride, your current GPS position is shown on the chart so you can see where you are on the profile and what's coming up. The chart displays total elevation gain and loss, and you can tap any point on it to fly the map to that location.
Track your ride
If you want to record your ride and see it on a map in your profile, you can do so with the Mapforge µlogger integration. The µlogger app is available for Android and can be configured to push your progress location live to Mapforge. You can share the link to your track, so friends can follow your ride.
After your ride
You can export your track as GPX or GeoJSON from the feature details panel - handy for sharing your route or importing it into other apps.
In the "Share" panel, you can decide to share your track publicly in the Mapforge gallery, or just share the map link with others directly.
Other Apps and Tools
There are quite some apps that can be used in combination with Mapforge for optimal results in planning your bike trip:
- gpx-simplify-optimizer (simplify gpx track before import)
- mapshaper.org (another gpx simplifier)
- komoot gpx merge tool (merge and repair gpx tracks)
- cyclosm.org (base map, also available on mapforge)
- opencyclemap.org (another bicycle base map, from thunderforest.com)
- mapillary.com (street view like photos)
- opencampingmap.org (camp sites)
- campwild.org (shelters)
- bikeparking.lorenz.lu + rackfinder.app (bike parking)
- tilda-geo.de (help to improve bicycle related data in OSM)
Creating bike routes:
Netzpolitik.org recently tested some privacy friendly routing apps (german).
- onthegomap.com (simple routing and track export)
- cycle.travel (routing + mobile app)
- bikerouter.de (routing with a lot of options)
- brouter.de (original project for bikerouter.de)
- sherpa-map.com
- veloplanner.com
- graphhopper.com (bike routing)
Commercial alternatives for bike routing:
- ridewithgps.com
- alltrails.com (former gpsies.com)
- bikemap.net
- Garmin Connect
- Komoot
- Outdooractive
- Strava